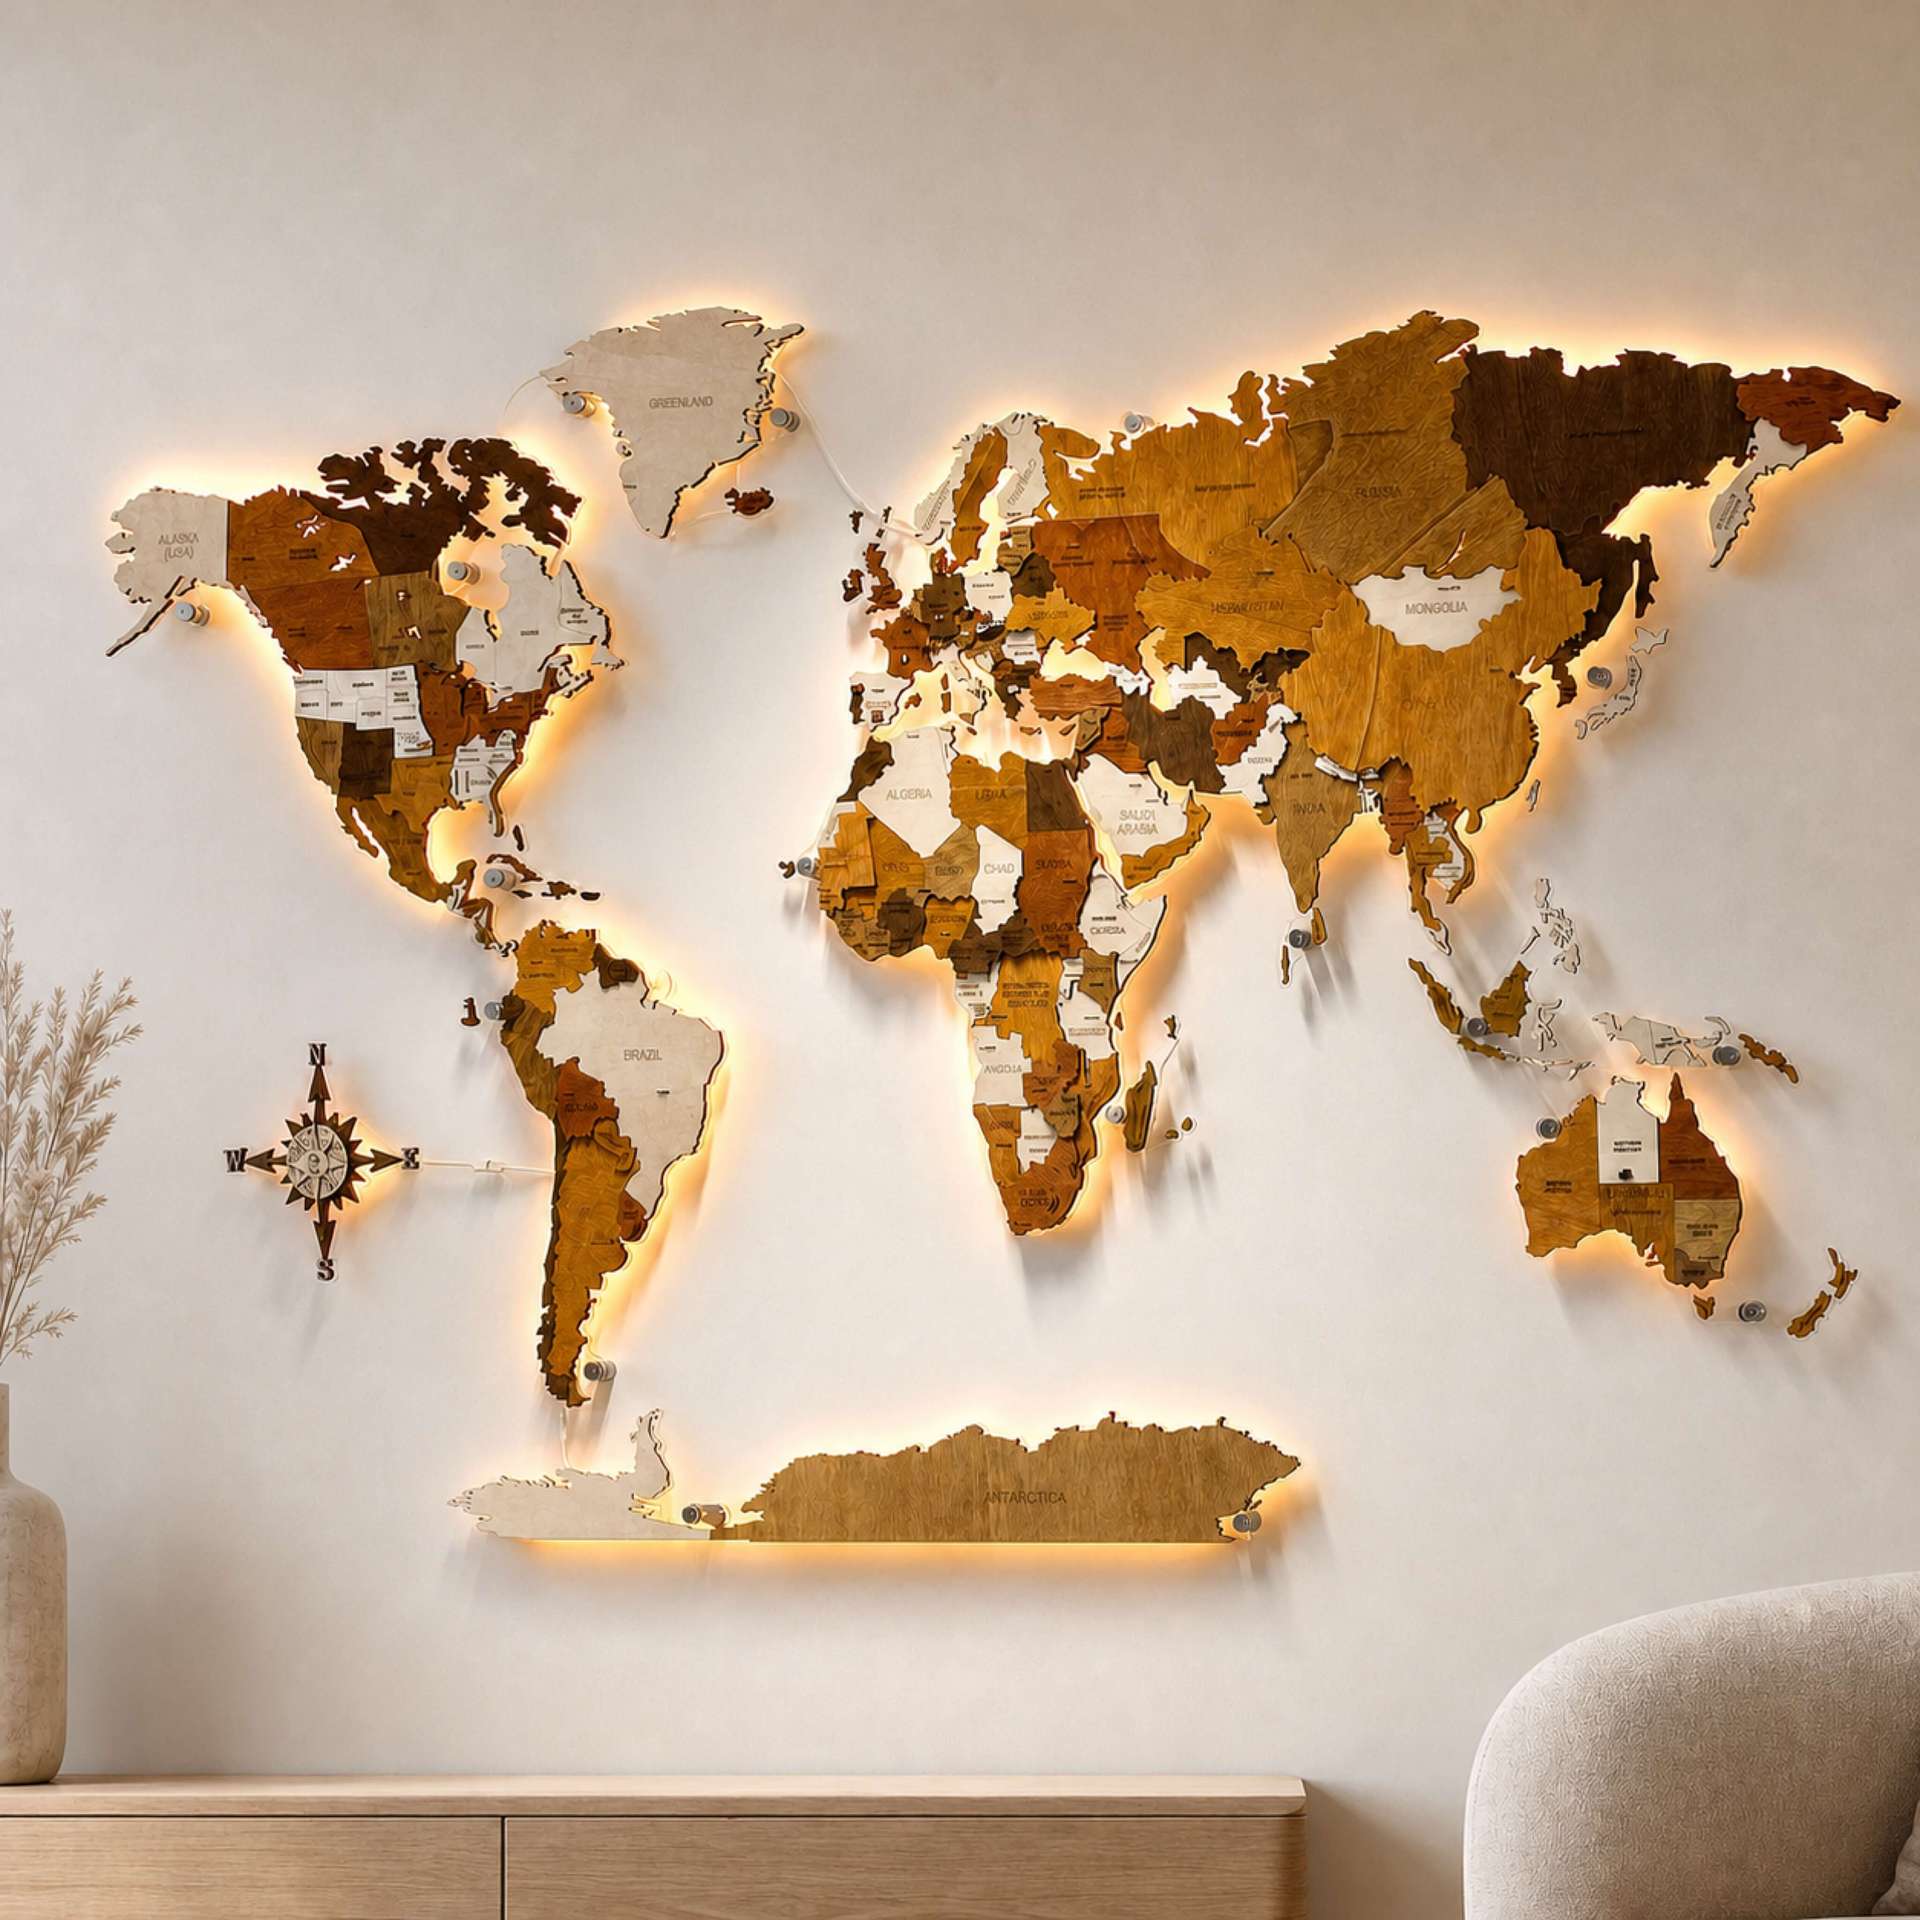
An LED wooden world map is more than wall decoration. It combines detailed travel-inspired design with soft ambient lighting for a home, office, hotel or representative space. The wooden geography remains attractive when the light is off; when switched on, the LEDs create a diffused glow around the acrylic-backed panels.
This guide explains how to plan the complete system: the map, power supply, controller, cable route, concealed or visible installation, mounting and compatible illuminated accessories. Exact designs, finishes, languages and sizes can change, so use the live product selector for the current choices and ask us for a configuration-specific drawing when your wall or electrical connection will be prepared in advance.
The best time to choose LED accessories is when you order the map. We can coordinate the finish, scale, connectors, controller, power capacity, cable route and mounting layout as one installation. Later additions are often possible, but may require compatibility checks.
Build the right LED map setup
Start with the map that best suits your interior:
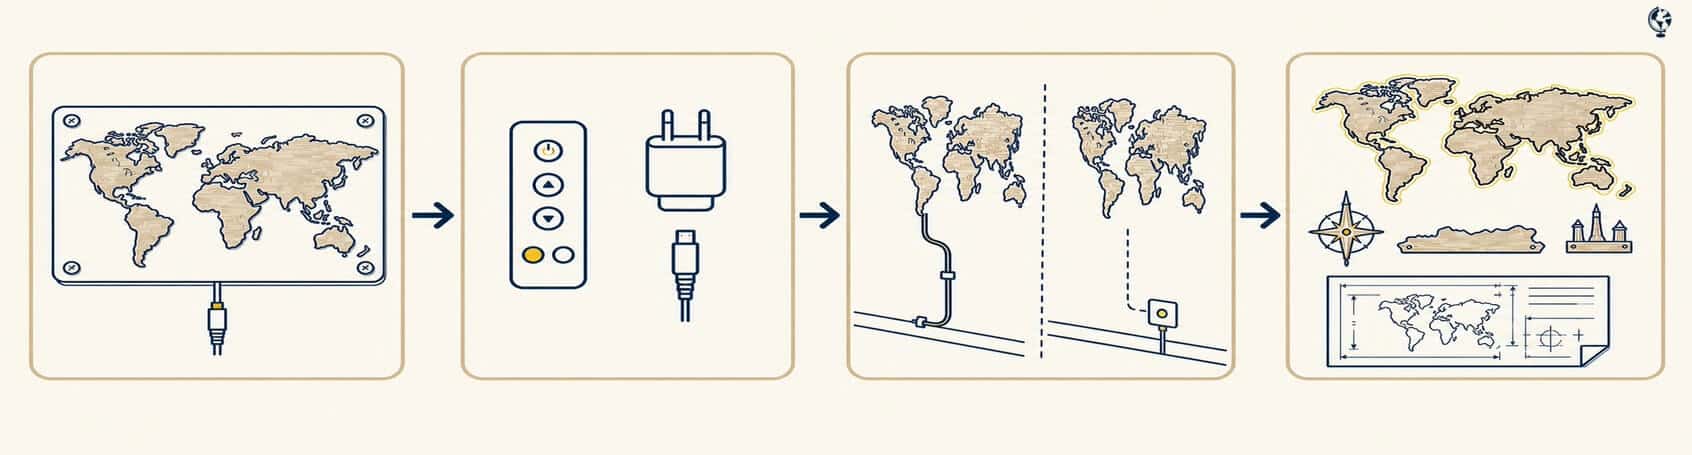
Choose the current design, finish, language and size on the relevant product page. Then plan the technical details around that exact configuration:
LED control: supplied remote, smartphone control where supported, and setting memory if you intend to use a separate wall switch.
Power connection: a destination-appropriate plug/adapter and either a nearby socket or a prepared mains point.
Cable exit: the standard exit from South America or Antarctica, or another agreed location prepared during production.
Visible or concealed wiring: decide whether the cable may remain visible or whether the route and components should be hidden.
Cable finish: discuss the colour, length, sleeving and detachable concealed sections before production.
Installed depth: use the standard stainless-steel stands, or ask whether a custom stand height is available when you need a different shadow gap or more space behind the map.
LED expansion: add a compatible illuminated compass, Antarctica, landmarks or other current LED options.
Technical drawing: request the drawing for your selected configuration if fixing points, power or cabling must be prepared before delivery.
This keeps the guide useful as new map finishes and LED options become available. The selected product and quotation are always the final specification for your order.
Choose the size for the complete wall
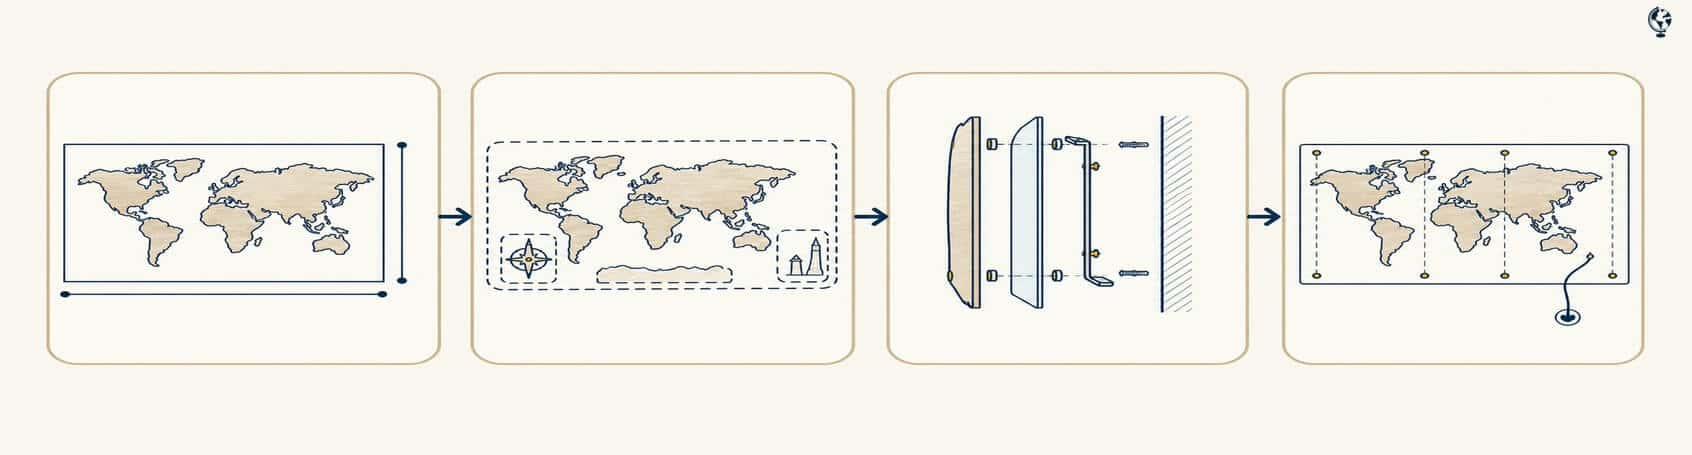
Measure the usable wall, not only the approximate width of the base map. Reserve space for the complete composition, including a compass, illuminated Antarctica, monument panel or any future addition you are considering.
Listed map dimensions normally describe the wooden map itself. The acrylic backing, stainless-steel stands and required installation clearance can make the final installed outline and depth slightly larger. Weight, number of panels, stand height and fixing layout also vary by design, size and customisation; larger maps may divide major sections into additional panels.
Choose fixings for the actual wall material and the confirmed weight of the ordered configuration. If a socket, cable or wall-light point is being installed before the map arrives, do not calculate its position from a generic size table. Ask us for the exact mounting and electrical drawing.
What the LED system includes
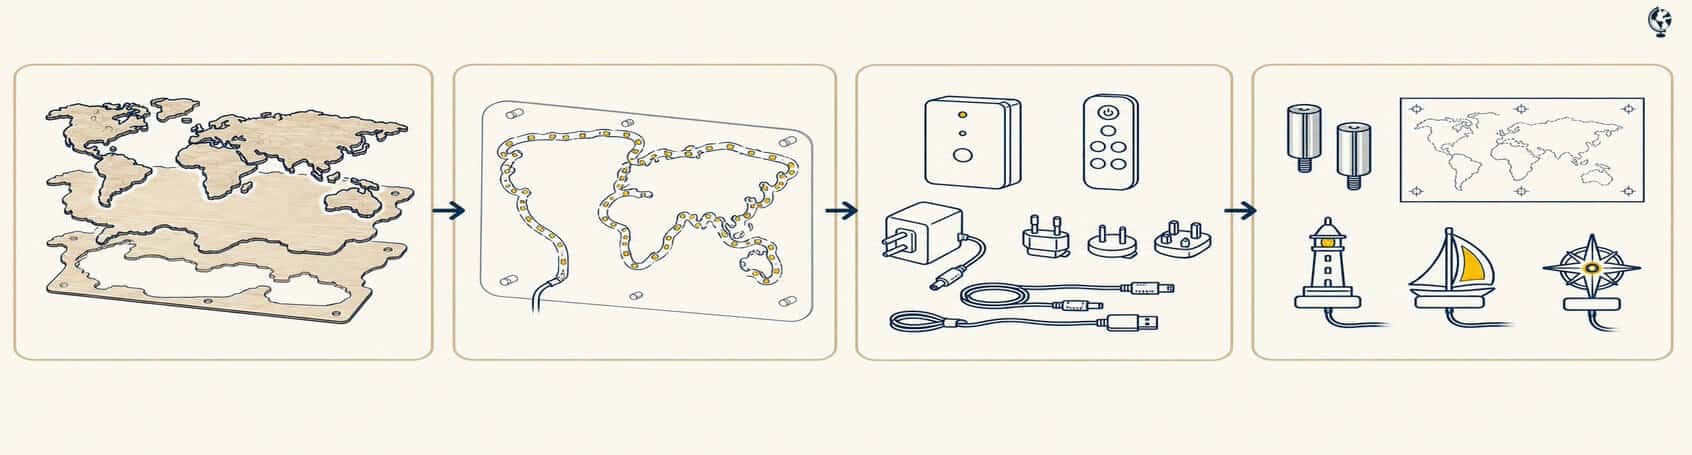
The system supplied for a typical LED map consists of:
wooden map panels with detailed engraved or printed geography;
acrylic backing with pre-installed LED lighting;
LED controller and remote control;
power supply/adapter and connecting cables;
stainless-steel wall stands and the applicable mounting template or guide;
islands and decorative pieces included with the selected design; and
any chosen LED accessories with their compatible connections and mounting parts.
The exact panel count, templates, hardware, decorative content and accessory parts depend on the selected product. Check the order specification and the instructions supplied with your map.
LED maps use this acrylic-backed panel and stand system, so they do not mount in the same way as a regular non-illuminated 3D wooden map. Installation normally requires drilling, wall-appropriate fixings and access to mains power.
How the lighting connects
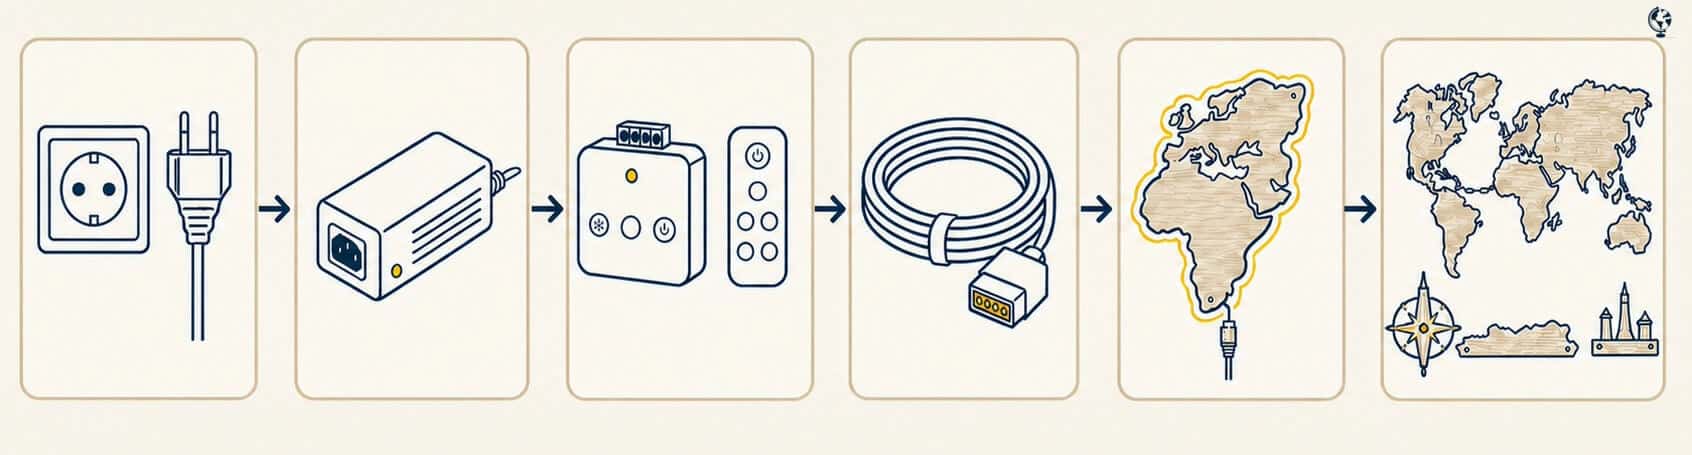
The complete lighting path is simple:
Mains supply → regional adapter/LED driver → RGB controller → low-voltage lead → first illuminated map panel → connected map panels → compatible LED accessories
The controller sits between the power supply and the illuminated map. The main low-voltage lead normally reaches the map at South America or Antarctica. If the cable needs to appear elsewhere, agree the exact exit before production so that we can coordinate it with the map and wall plan.
Illuminated sections are linked using 4-pin connectors. The arrows on each connector must face one another. A practical installation test starts with the first panel and adds the remaining sections one at a time, confirming that every newly connected part lights correctly.
Compatible illuminated accessories connect through the planned additional connections, normally accessed near the lower part of South America. Once the system is assembled, test the complete map and all accessories in red, green, blue and white before the panels are finally aligned and tightened. This confirms both the connections and consistent colour output.
Remote, app and wall-switch control
The supplied remote controls RGB colour selection, brightness and available lighting effects. Smartphone control is available with supported controller versions; if phone control matters to you, ask us to confirm the current controller and compatible app for your order.
A documented concealed installation also retained its last colour and brightness when the 230 V supply was switched off and on at a separate wall switch. Controller versions can change, so ask us to confirm setting memory before planning the map as a wall-switch-operated light.
Select the correct plug for the delivery destination. A nearby socket is sufficient for a standard installation. A prepared wall power point may be used for a customised concealed setup, but the electrical work and switching arrangement should be reviewed by a qualified local electrician.
Compatibility matters when adding options
Connector wiring can differ between map generations or components. One documented connection was labelled +24V, R, G, B, but this is an example rather than a universal pinout. The existing wire order must be preserved so that every connected section displays the same colour.
If you add an illuminated accessory later, our support team may ask for a clear photograph of the South America connection showing the terminal labels, connector and wire order. We may also need to confirm the controller, available power capacity and cable arrangement for the complete setup. Do not change or repair the wiring before checking compatibility.
Customise the installation before production
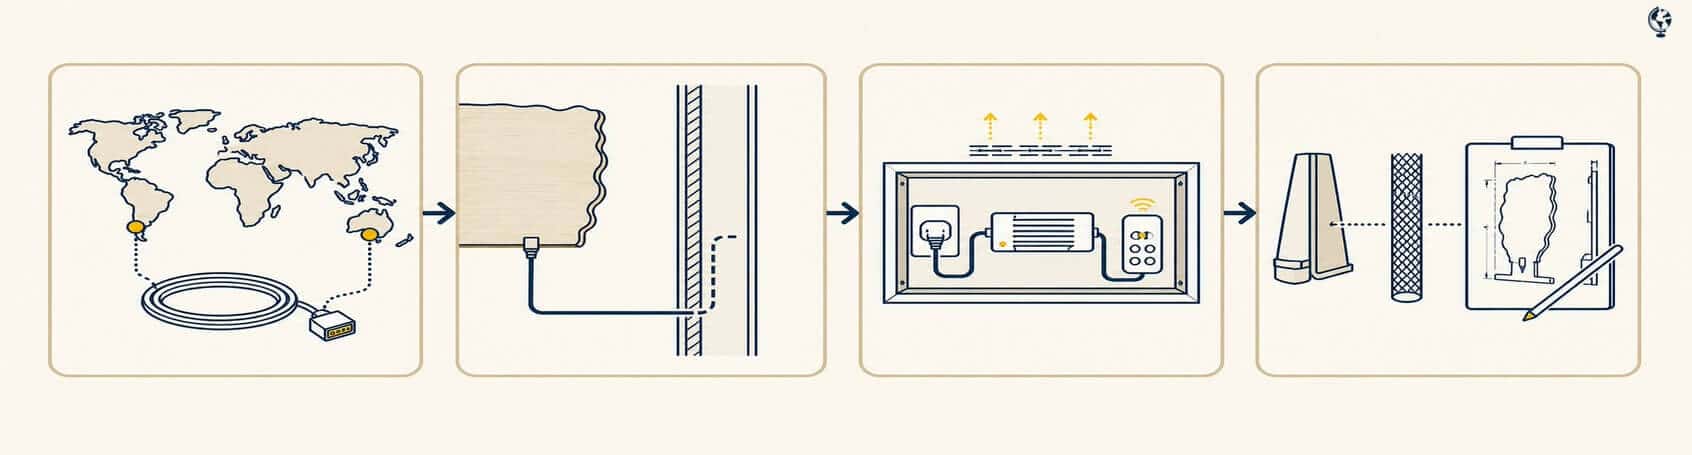
Many installation details can be adapted when they are agreed before the map is made. Tell us how your wall is prepared and what you would like to see—or hide—in the finished room.
Cable exit and routing
The usual main cable exit is at South America or Antarctica. Another position can be prepared when we receive the exact requirement before production. This is especially useful when the socket or concealed cable has already been planned by an architect or electrician.
For a standard visible installation, the supplied lead runs from the map to a nearby outlet. For a cleaner architectural installation, ask about a concealed-cable configuration. Concealed cable sections can be prepared so that they disconnect at both ends, allowing the cable route to be installed in the wall and connected to the map later.
Cable colour, length, sleeving and the transition between visible and concealed sections can also be discussed. A past custom installation used approximately 2 metres of white cable followed by the controller and approximately 1 metre of black source cable. That is only an example: the current lengths and component positions should be designed for your wall.
Hiding the adapter, driver and controller
In a planned custom installation, the adapter, LED driver, controller and cabling may be concealed behind the map or integrated into the wall arrangement. The available depth depends on the selected hardware and stand height.
Concealment must still allow suitable access, ventilation and safe servicing. Confirm the dimensions of the actual components before building a recess, and have a local electrician review the mains connection and applicable regulations. Do not permanently seal components that may need to be reached or replaced.
Stand height and visual depth
The stainless-steel stands create the space between the wall, acrylic backing and wooden map. This gap helps form the illuminated halo. Ask whether a custom stand height is available if you need additional component space or a different shadow effect. The final depth should be agreed together with the cable and concealment plan.
Map appearance and personal details
Use the live product selector for current sizes, colours, wood finishes and languages. Depending on the product and project, we can also discuss supported custom details such as staining or colour adjustments, selected country treatment, extra islands, ocean names, flags, text and other decorative additions. Send your requirements before production so that feasibility, layout and pricing can be confirmed.
Pre-installation drawing
Request a configuration-specific drawing whenever the wall is being built, drilled, wired or fitted before the map arrives. It can coordinate the applicable map outline, acrylic/panel layout, fixing points and cable position. The selected map, accessories, cable exit and custom stand height must be final before the drawing is prepared.
Before closing the wall, confirm:
the exact map design, size and all LED accessories;
the cable exit, visible or concealed route, colour and required lengths;
the plug, controller features, component dimensions and accessory power capacity;
the complete installed outline, panel layout, fixing points and depth;
accessible positions for the adapter, driver and controller;
the electrician's approval of the power point, switching, ventilation and local requirements; and
that every custom requirement appears in the quotation.
Mounting and first connection
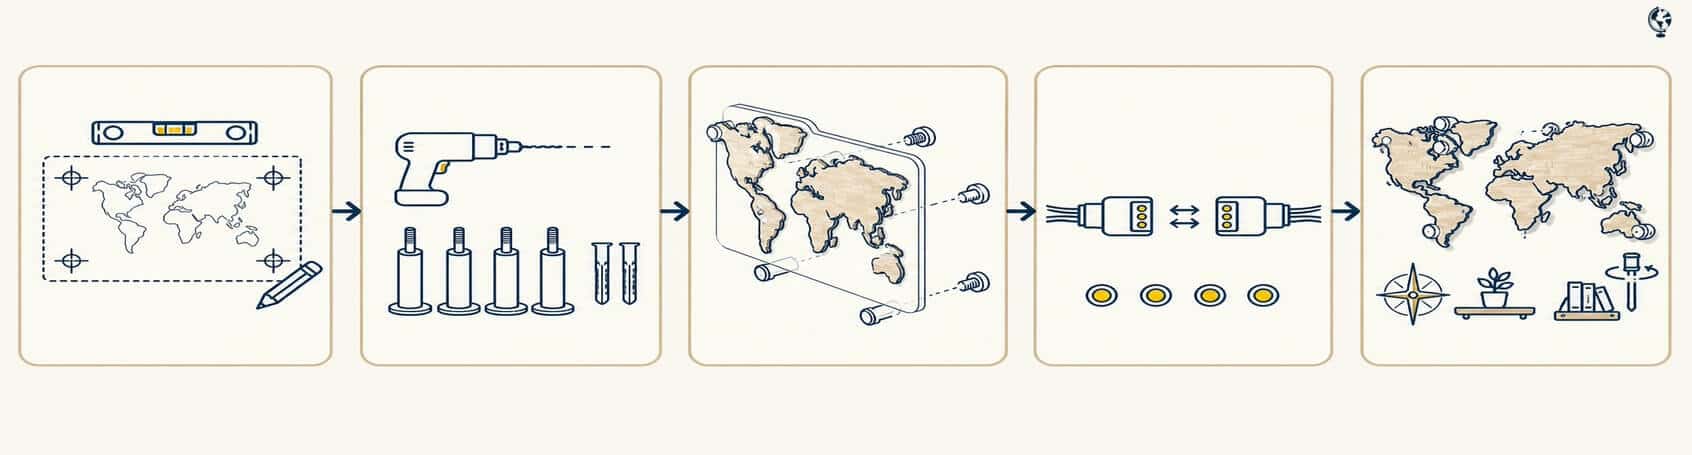
Always follow the template and instructions supplied for your exact configuration. The overall sequence is:
Position the supplied template level on the wall and mark the specified fixing points.
Install plugs or other fixings suitable for the wall material, followed by the stainless-steel stands.
Place the main acrylic-backed panels on the stands without fully tightening them.
Connect the illuminated sections in the instructed order, with the arrows on every 4-pin connector facing each other.
Connect the selected illuminated accessories to the compatible additional connections.
Attach the controller and adapter, then test red, green, blue and white across the complete setup.
Align the panels, tighten the stand caps and install the remaining islands and decorative pieces.
There is no universal hole count, drill size or panel order for every LED map. These details depend on the model, size, wall and customisation. The supplied template or project-specific drawing is authoritative.
Add illuminated accessories to complete the installation
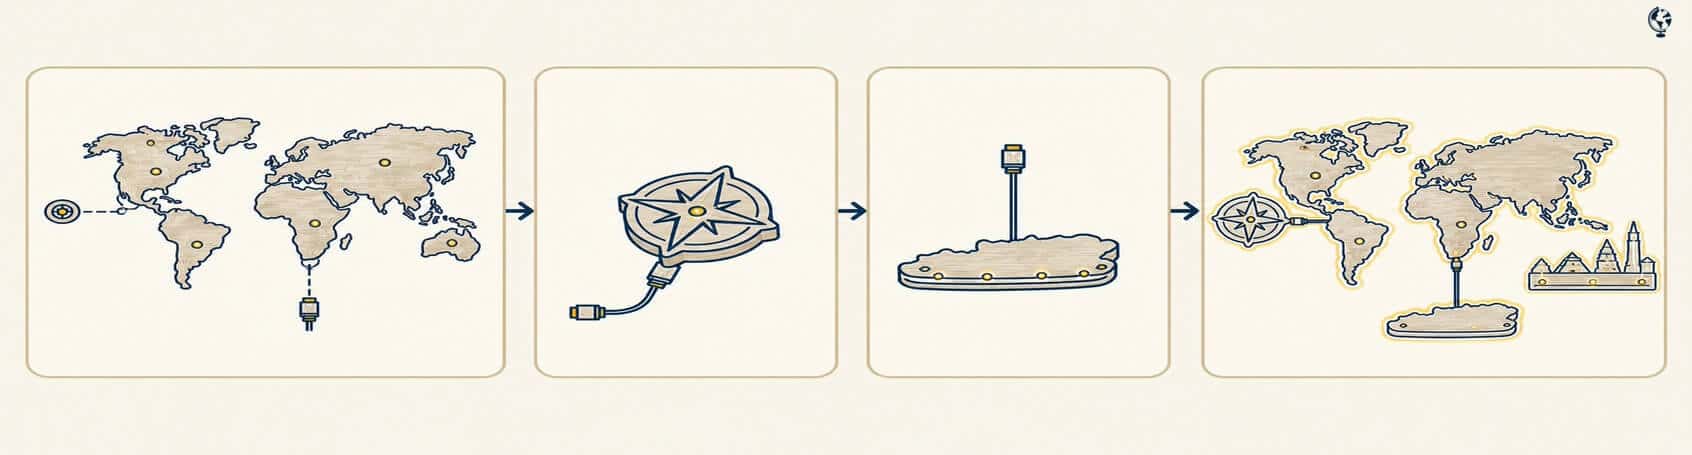
Plan the whole wall instead of treating the base map as the only decision. See the current range in LED Maps & Decorations.
LED 3D Compass
The LED 3D Compass adds an illuminated navigation motif and visually balances open space beside the map. It has its own acrylic backing, LED connection and stainless-steel stands. Choose the version matched to your map so that scale, finish and lighting work together.
LED 3D Antarctica
The LED 3D Antarctica completes the world outline as an illuminated continent. It includes its own acrylic backing, connection and stands; larger versions may consist of multiple connected parts. Matching it with the original order makes it easier to reserve the correct space and connection.
LED world landmarks and monuments
The LED 3D World Monuments and Attractions panel expands the installation with 25 famous landmarks. Use the live product page for current sizes and custom choices, and include it in the technical plan so its mounting position and power connection are coordinated.
Decorative additions
Non-LED additions such as flags, ocean names, extra islands, custom text and other current map decorations can add more personal meaning around the illuminated centrepiece. Included island coverage and mounting details vary between designs, so check the selected product page and order specification.
Ordering options together gives you:
coordinated finish and scale;
confirmed connector and controller compatibility;
appropriate power capacity and cable routing;
one wall composition, mounting layout and technical drawing; and
easier installation and complete colour testing.
Adding an accessory later is often possible, but access to the existing connection may require loosening a panel, and compatibility must be checked first.
Special installations and later upgrades
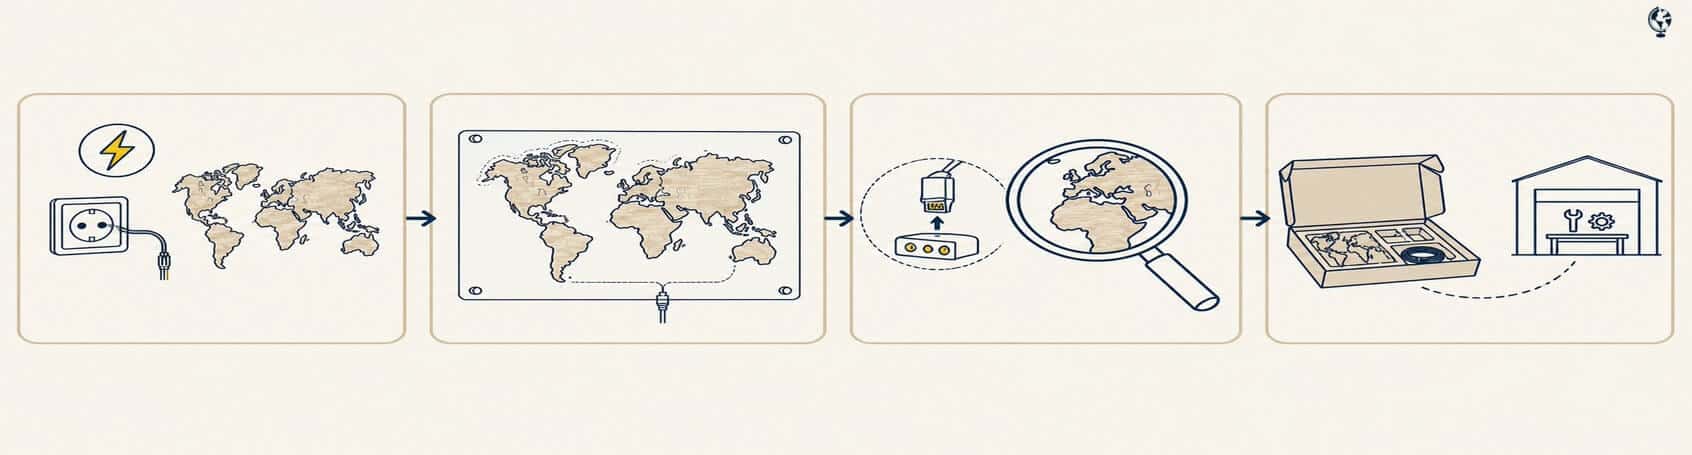
Prepared wall-light point: A customised LED map can use an existing or newly prepared wall power point when the exact position and components are coordinated in advance. Have a qualified electrician review the connection.
Separate Perspex display board: A non-standard board-mounted composition should be dry-fitted with all map and accessory pieces before drilling or bonding. Leave a balanced border, keep mounting holes accessible, and use Perspex-safe cleaning and attachment methods. A previous training layout allowed roughly 10 cm at each side and 2–5 cm at the top and bottom, but your final board must follow the actual map and accessory outline.
Adding LED accessories later: Send a photo of the installed map and, when requested, a close-up of the South America connection with the terminal labels and wire order visible. We will check whether the controller, connector and available capacity suit the requested accessory.
Upgrading a non-LED map: A workshop LED retrofit may be possible for some non-illuminated maps. It is not a universal DIY kit. The map generally needs to be returned in its original packaging, and feasibility, transport and price are assessed individually.
Quick connection troubleshooting
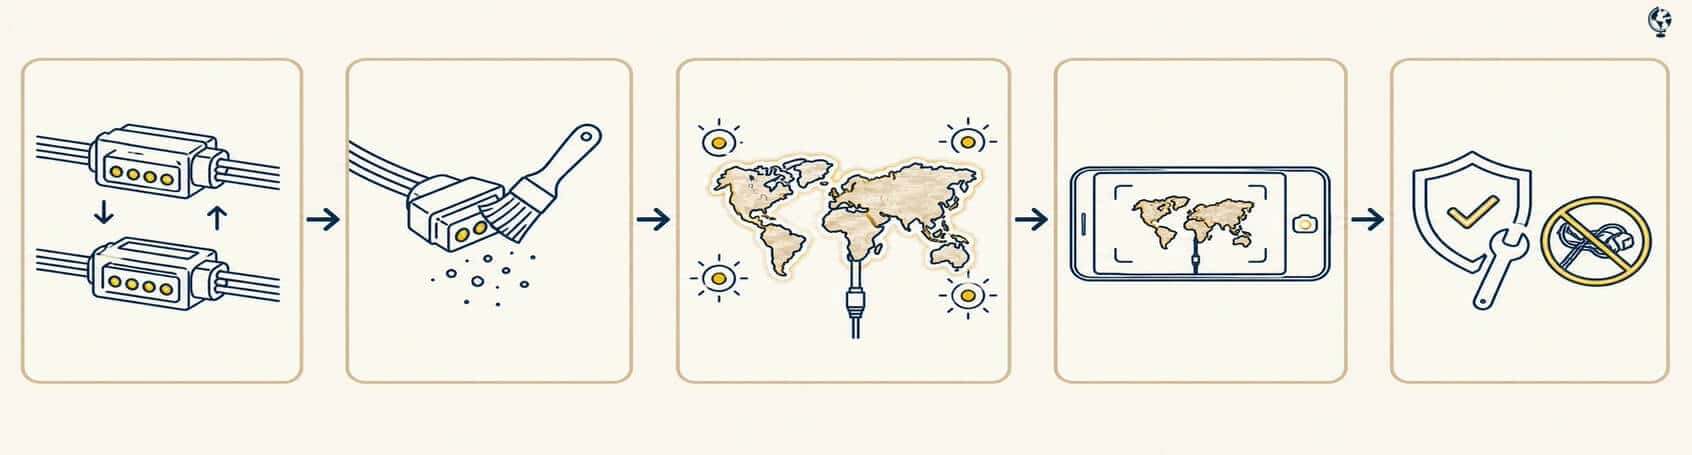
If a panel or accessory does not light correctly:
Check that the connector arrows face each other and every plug is fully seated.
Remove dust from the connectors and visually inspect the LED-strip attachment points.
Test red, green, blue and white across the complete map.
Record a short video showing the controller, map and affected section.
Contact us before replacing or repairing wiring. A mismatched wire order can make one section show a different colour.
Keep the original packaging in case a panel must be transported for workshop service.
Frequently asked questions
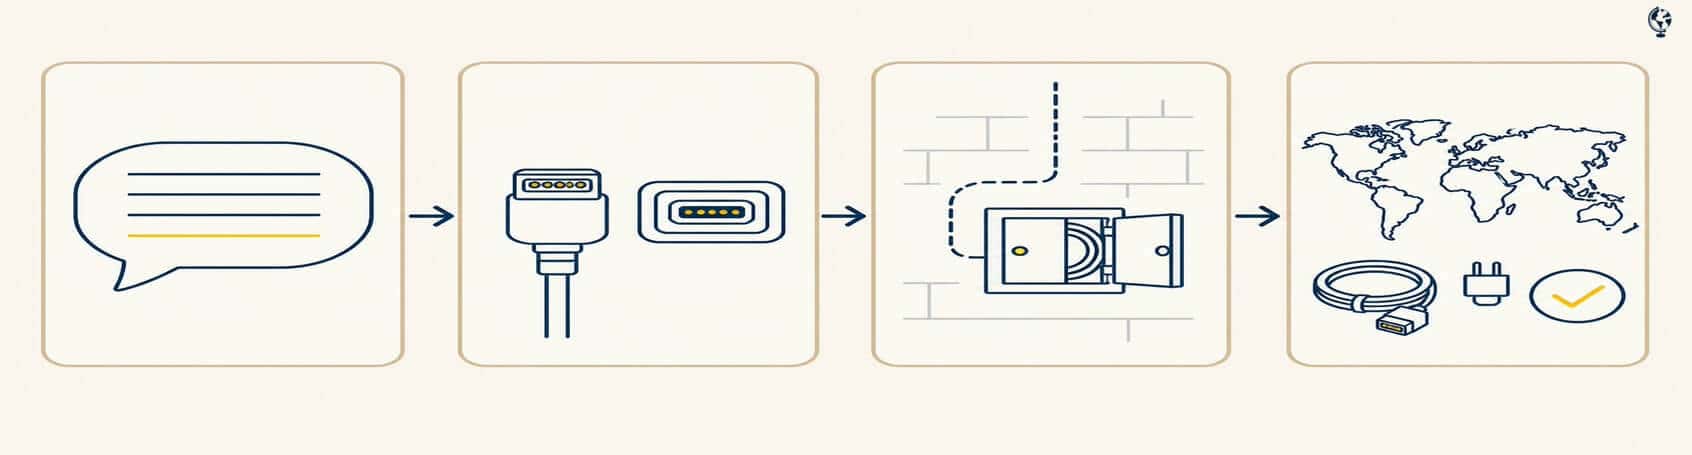
How are the illuminated parts connected?
The power supply and controller feed the first map section. The illuminated panels then connect in sequence with matching 4-pin connectors. Compatible LED accessories join the planned additional connections.
Can the cables and electronics be hidden?
Yes, a concealed setup can be requested. The cable route, component positions, stand height, access, ventilation and local electrical requirements must be planned for the exact configuration before production.
Can I choose where the cable leaves the map?
The normal exit is at South America or Antarctica. A different position can be agreed before production and coordinated with your wall drawing.
Can I control the map with a wall switch or phone app?
Remote control is supplied. Smartphone control and setting memory depend on the controller version, so ask us to confirm these functions if they are important to your installation.
Can I add LED accessories later?
Often yes, after we check the existing connector, wire order, controller and power capacity. Ordering them with the map gives the best coordination of finish, scale, wiring and mounting.
Are all map details illuminated?
The principal acrylic-backed panels are illuminated. Smaller islands and decorative elements vary by design. Dedicated LED accessories have their own backing, connection and mounting parts.
How much wall space and depth do I need?
Use the current dimensions for the selected variant and include the acrylic outline, stands, cable route and every accessory. Request a technical drawing for concealed or pre-built installations.
How many holes are required?
Use the mounting template or drawing supplied for your selected configuration. There is no reliable universal count for every map, size and accessory combination.
Can a non-LED map be upgraded?
A workshop retrofit may be possible. Contact us for an individual assessment and retain the original packaging.
Your final pre-order checklist
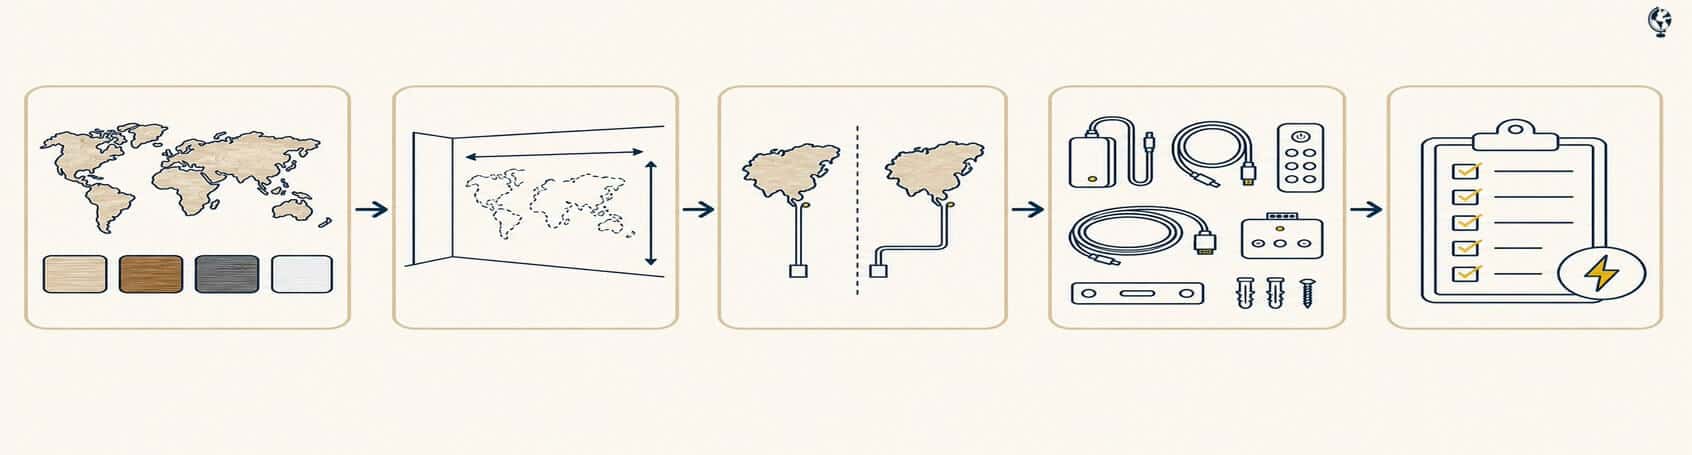
Choose the current map design, size, finish and language.
Plan the complete wall composition, including LED and decorative additions.
Confirm the installed outline, depth, weight and wall substrate.
Confirm the destination plug, controller functions and accessory capacity.
Select the cable exit, length, colour and visible or concealed route.
Decide where components will sit and whether custom stand height is needed.
Obtain the configuration-specific drawing if the wall is being prepared in advance.
Have your electrician or installer review the power, switching and fixing plan.
Ready to plan your LED world map? Email shop@68travel.com with the selected map, desired LED accessories, wall dimensions, destination, preferred cable exit and a photo or drawing of the wall. We will help coordinate the complete setup before production.